washing problems I've run into

By Quarrel, in X-Wing

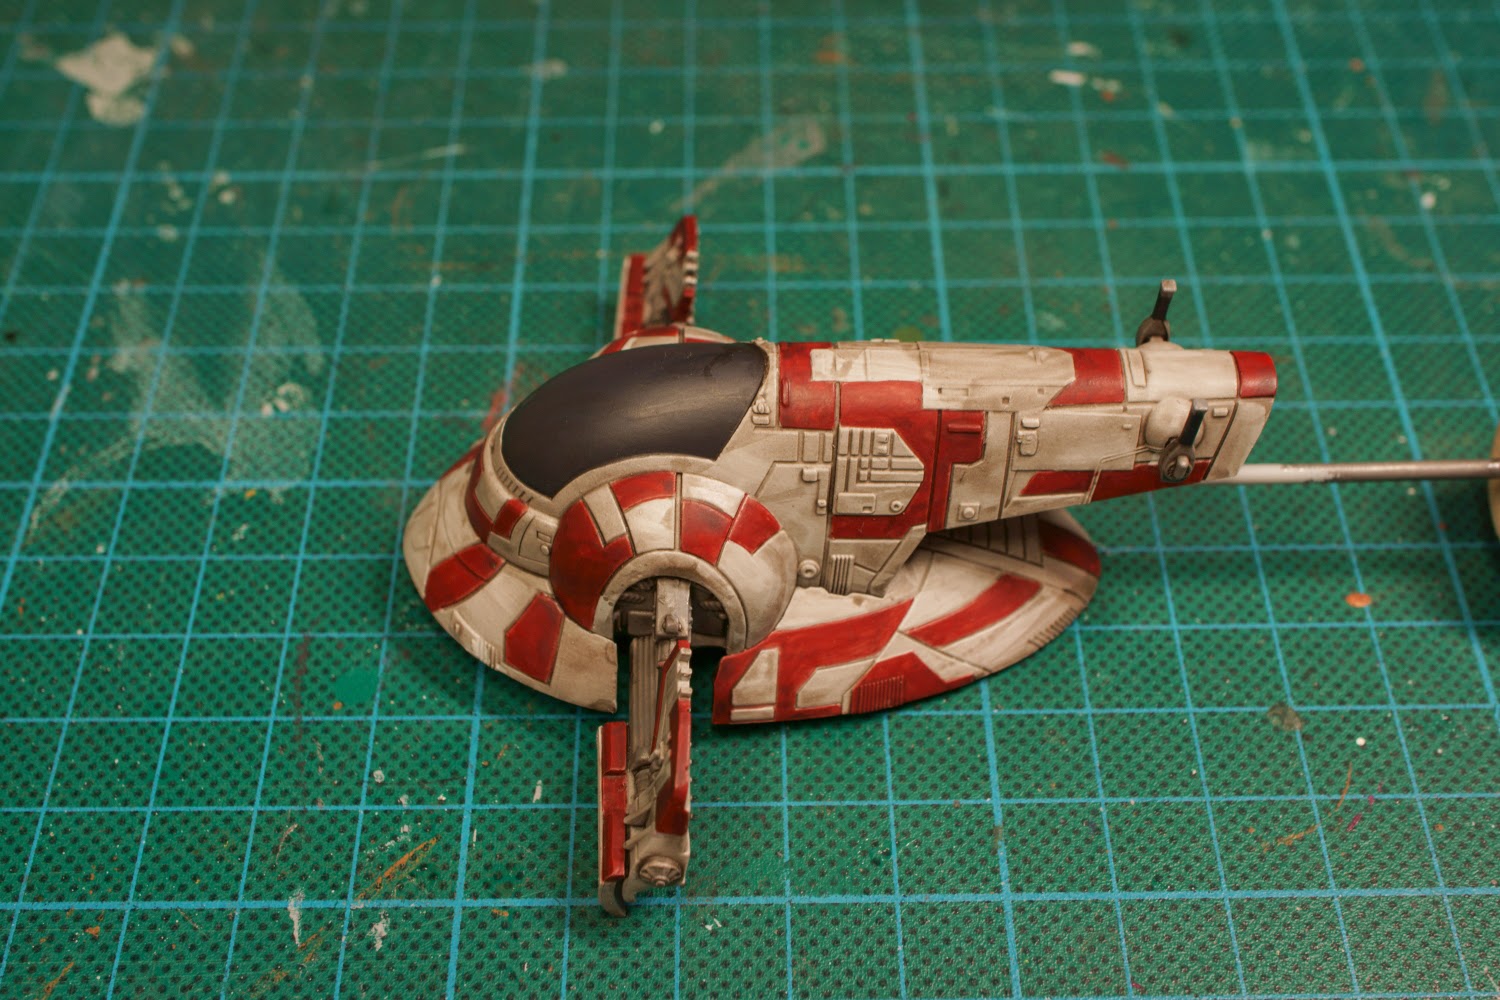
I ran into some difficulty applying a black wash to a Firespray I just repainted. Wash doesn't behave the same way on large flat areas as it does on 35mm figures.

  • Washing the entire surface at full strength leaves a thin film of wash everywhere, making the base coat noticeably darker and glossier.
  • Washing the entire surface with a diluted wash avoids the issues above but doesn't make the cracks distinct enough.
  • Trying to apply wash into just the cracks leaves a distinct, wobbly outline where the wash overflows the detail or your brushwork was anything less than perfect. (And besides, if you're that good with a brush, you aren't washing anymore, you're painting.)

Thanks in advance!

You need to use diluted wash over the cracks several times. Since you don't leave the exact same border with each coat, you won't get that wobbly outline, but the extra coats will get the distinction you're looking for. I don't know if you should use the diluted wash on the rest of the flat surfaces, I would wait and see how the cracks look first and then decide if you need to darken the surfaces a little.

My 1st Firespray I had to throw a wash of Citidel Nuln Oil on, the whole ship. The ship was just too bright for me. I watered it down just a little by putting some water on the brush before dunking it into the wash. It's not like the wash couldn't be thinned a little anyway. I didn't see any problem other than it pooling a bit at the back(lying the ship on the engines) that just needing some clean up. Waited for it to dry before coating the back. Turned out well as far as I'm concerned.

One method is to use a thinned down oil paint as your wash. After application you then gently wipe down the area with a cotton swab that has been lightly dampened in white spirits. It will remove the oil wash from the large, flat areas but leave the shaded crevices and panel lines unaffected.

Best to watch a youtube tutorial if you decide to go this route. I know there are several on there that depict this process.

I like to add a gloss coat first to the model before washing. This helps with the tonal changes and also helps with wiping off extra. The final step is a flat coat this seals and evens out the tones.

Line the cracks with a .005 Micron marker. Easy button!

Micron 'black-lining' leads to a more defined comic booky look, as opposed to the shading effect of a wash. Depends on what look you're going for.

  • Washing the entire surface at full strength leaves a thin film of wash everywhere, making the base coat noticeably darker and glossier.

Technically, 'a thin film of wash' will be left everywhere, no matter where you apply it. However it is very noticeable on large and fairly flat surfaces as the wash have no crevices to go to and will instead pool unevenly. Because of this you are going to have to restore the base colour just about any time you apply a wash. The runny quality of a wash makes it near impossible to not make some mistakes, even if you only paint the wash directly into any crevice.

On the first Firespray I painted, I washed the entire model in one go. As you can see in the first picture it looks quite horrible after the wash but after I had restored the base colours (second picture) it looks quite good!

I do wonder about the 'glossy' result you mention. If you are using a purpose made wash (Not an ink, or diluting a regular colour) the result is usually fairly matte. A wash that has not been used in a while can become glossy so always remember to give it a good shake before using.

Kath4f.JPG

Kath5f.JPG

  • Trying to apply wash into just the cracks leaves a distinct, wobbly outline where the wash overflows the detail or your brushwork was anything less than perfect. (And besides, if you're that good with a brush, you aren't washing anymore, you're painting.)

'Painting' a wash is not at all a bad idea. The main problem with restoring the base colours after washing a model completely is that it can take quite a long time to do so. So on my second and third Firespray I painted the wash straight into the panel lines which only required minor cleanup and thus saved a lot of time.

The properties of a wash makes it far easier to apply it to any crevice than regular paint as it almost flows from the brush to the panel line on its own. It helps if the model has been sprayed with gloss or stain varnish first. While perhaps not the best examples, the below two pictures shows one of my scratchbuilds, the first picture without shade, the second after shading, and with little clean up needed since I painted the wash straight into the panellines.

ASP3.JPG

ASP4.JPG

Edited by MacrossVF1

You can add a very small amount of washing up liquid to a wash to break the surface tension, allowing it to pool in cracks easier and run off flat panels so you don't get the blotchyness.

I use these to shade my models, easy to use and give a great result every time...

http://www.florymodels.co.uk/washes/

that site has an interesting technique for large flat surfaces, thanks for sharing

I do wonder about the 'glossy' result you mention. If you are using a purpose made wash (Not an ink, or diluting a regular colour) the result is usually fairly matte. A wash that has not been used in a while can become glossy so always remember to give it a good shake before using.

I do wonder about the 'glossy' result you mention. If you are using a purpose made wash (Not an ink, or diluting a regular colour) the result is usually fairly matte. A wash that has not been used in a while can become glossy so always remember to give it a good shake before using.

It was a brand new bottle of Vallejo Game Color black wash. From other links I've read, it isn't technically an ink wash but behaves more like one than like an acrylic wash.

I've tried those and I was not impressed though I suspect that the bottle I got was faulty. If I used too much the result became grey, almost like a mold has grown on top.