Tutorial: Scratchbuilding

By MacrossVF1, in X-Wing

So I've gotten it into my head that I should do a few articles on how to scratchbuild. Not perhaps the most in-depth series but it should be more than enough to give any beginners a decent boost. Here is the first part, the tools needed to actually build.

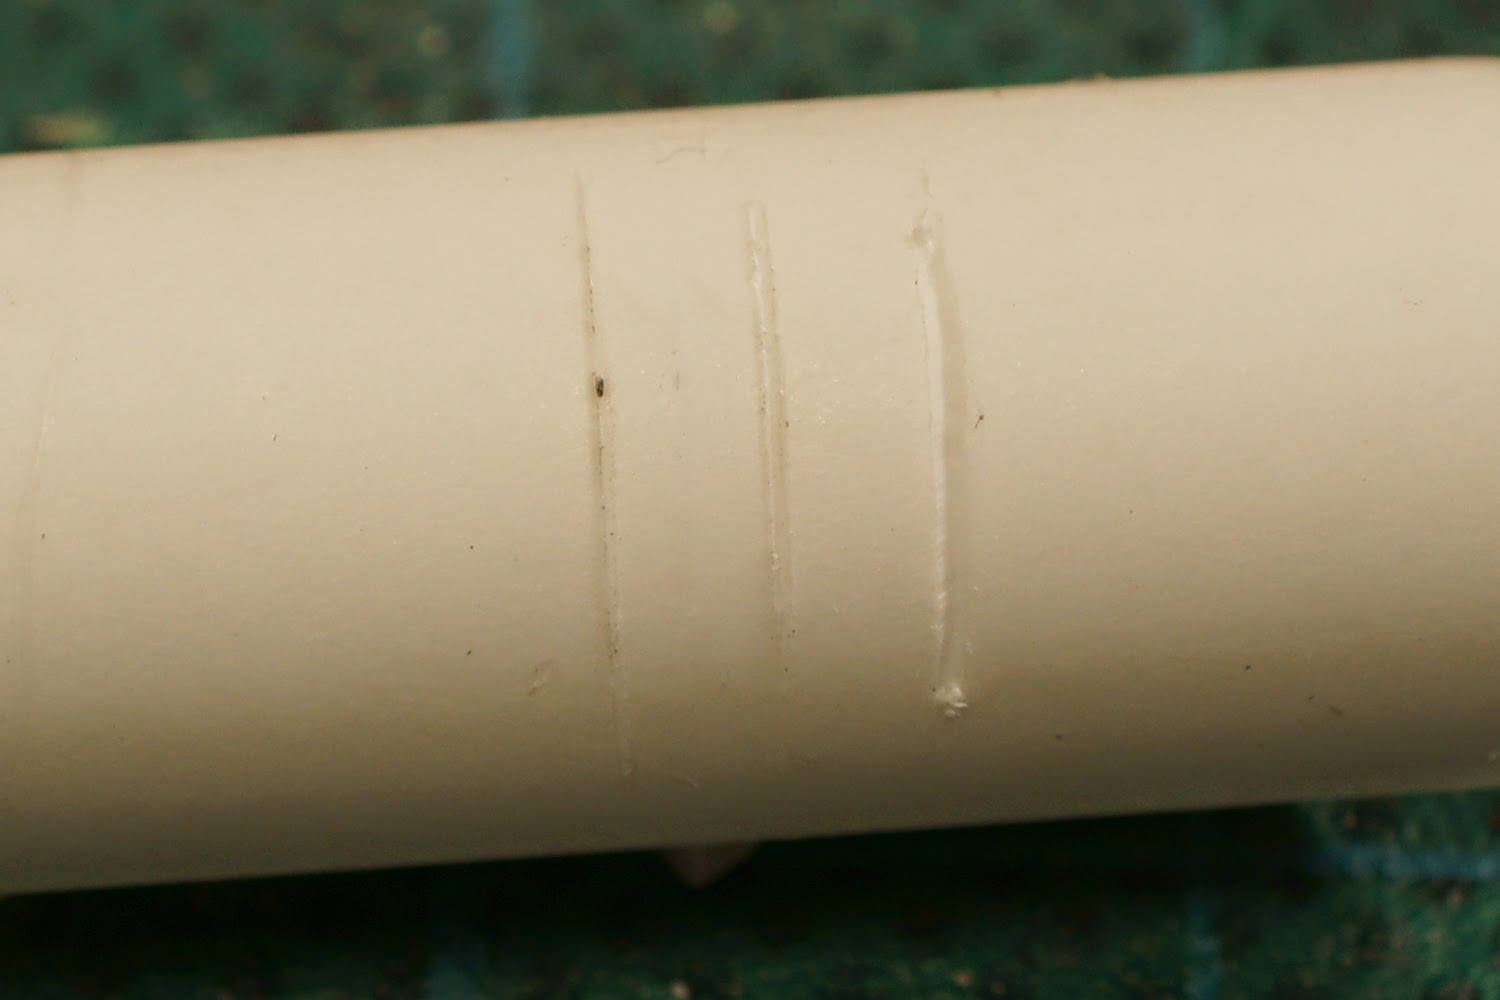
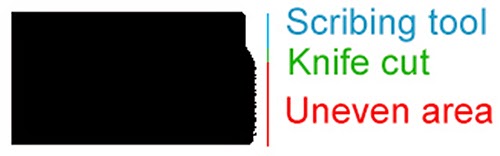
  • Knives - You are going to need knives. I personally use cheap snap-off blade knifes and scalpels but I know there are LOTS of alternatives and it very much comes down to personal preference. In any case, this is not optional and any hobbyist worth anything should already have a collection of favourite cutting implements.
  • Scribing tool - While perhaps slightly in the optional category, a good scribing tool will save you a lot of headaches, not to mention let you keep what little sanity you might have left. The one I'm using is from Tamiya but there are others that are equally useful.
  • Files and abrasives - This is also very much needed and also very much up to the preference of the user. I have several needle files that comes in several different sizes, shapes and grits as well as some sanding blocks and sanding paper. I've also found that the multi-grit sanding sticks normally used for polishing nails are very good.
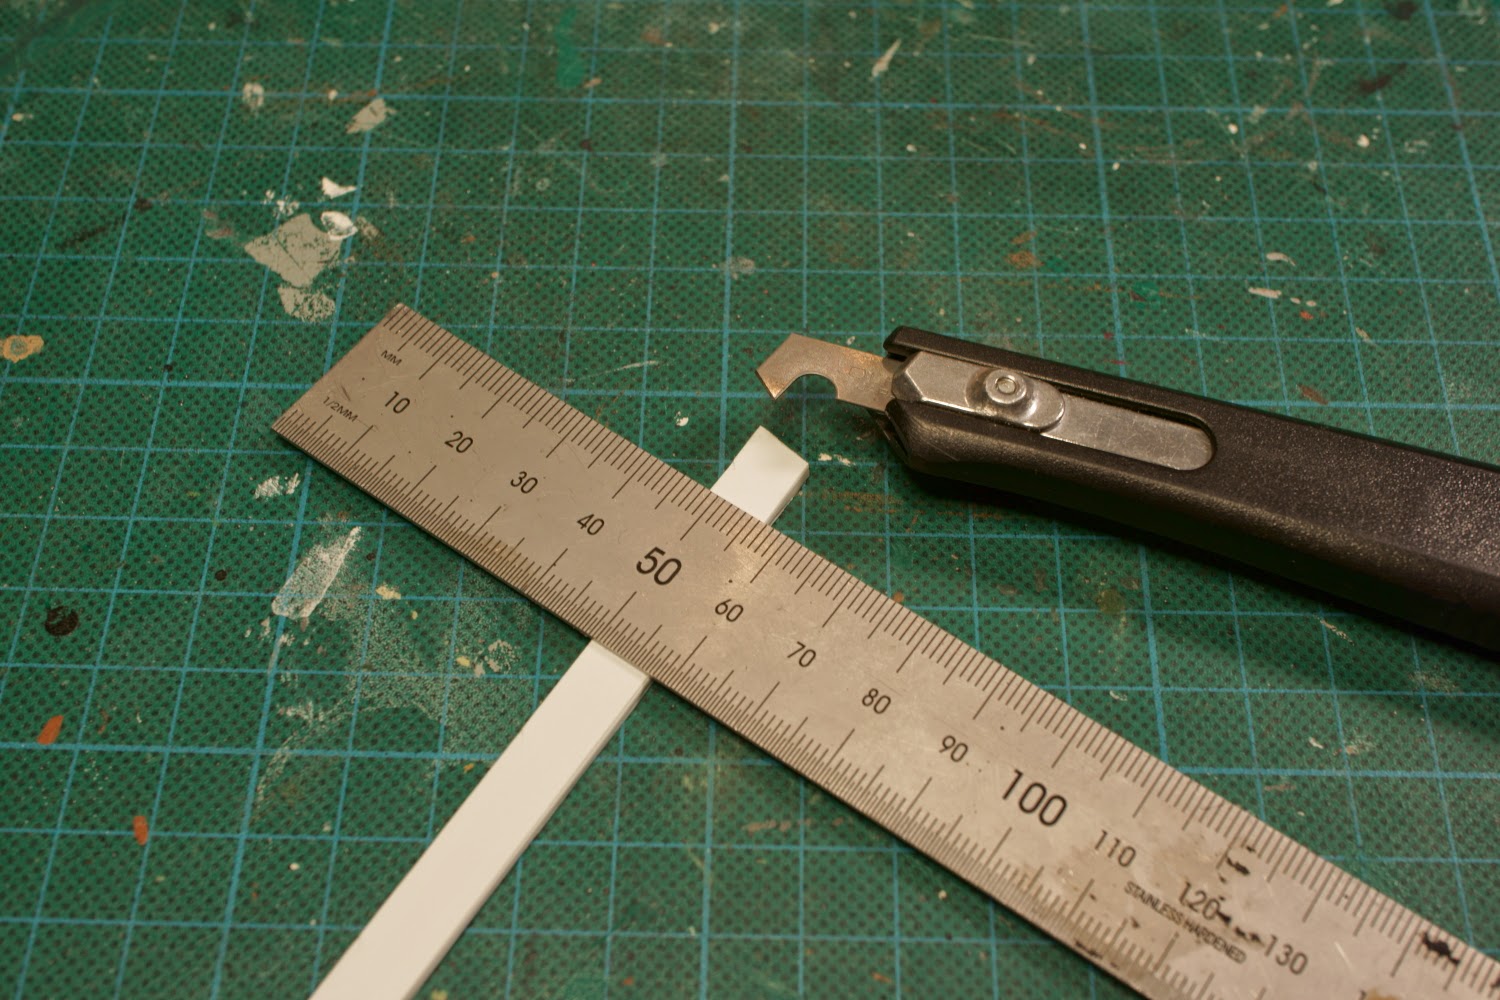
  • Side cutters - I use two side cutters, one that is rather heavy duty and can easily cut piano wire and another that is often called a sprue cutter as it is flat on one side and can really get close to the part getting cut loose.
  • Cutting mat - A self healing cutting mat is perhaps not necessary but it will save your worktable a lot of wear and tear.
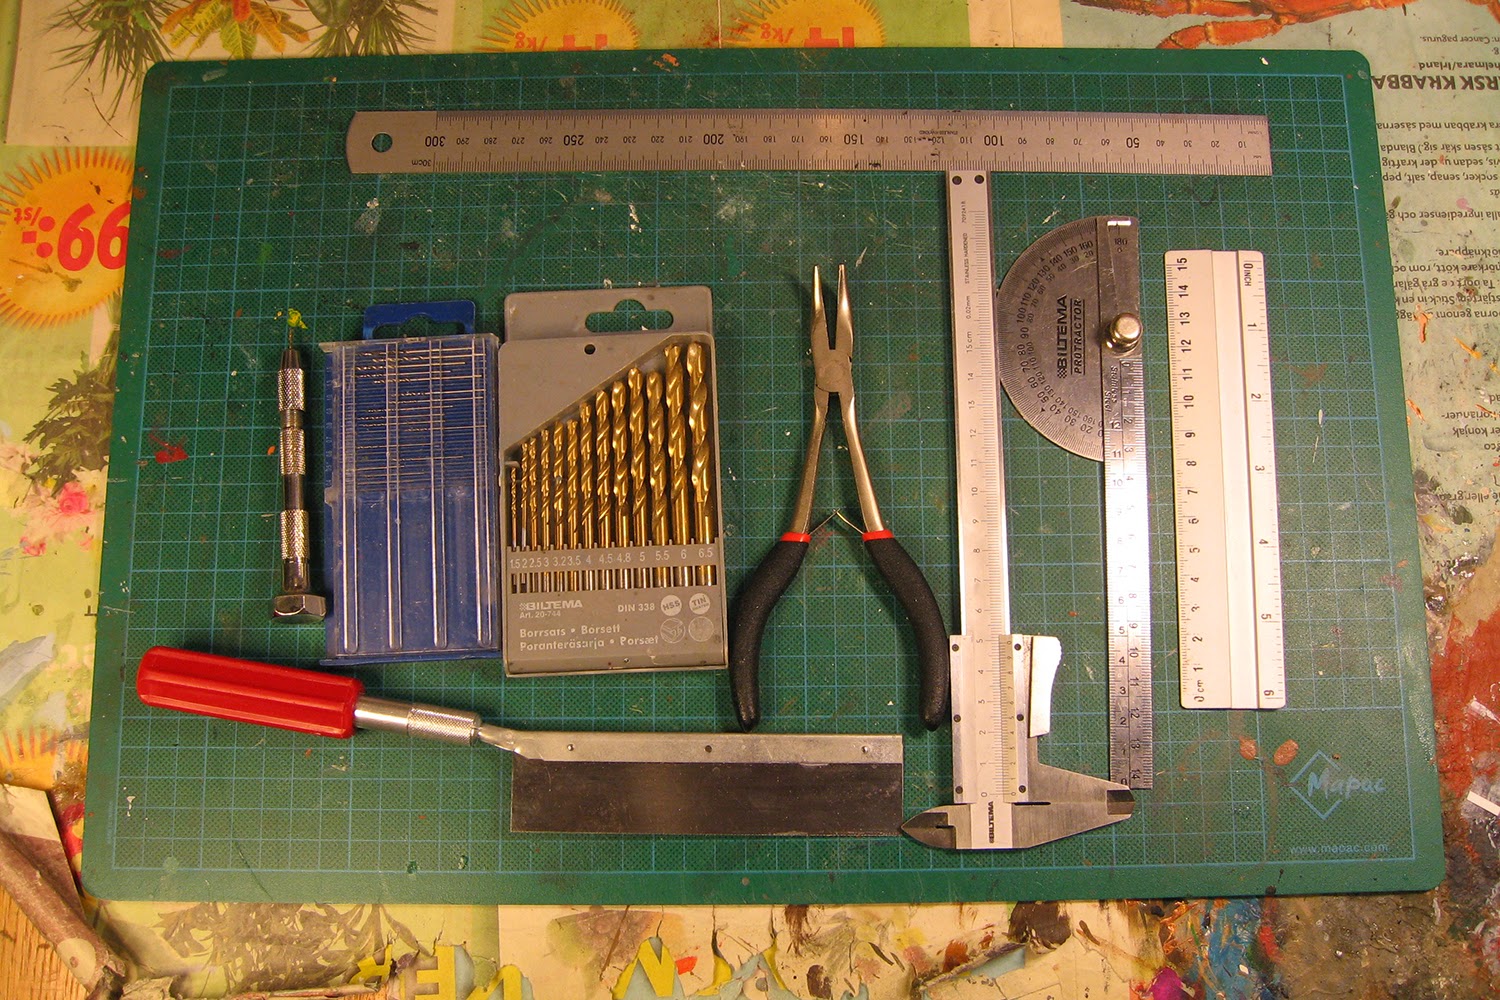
  • Pin vise and drills - This an absolute must! If you don't have a pin vise already go buy one, now! An assortment of drills in different sizes are also very helpful. I have two sets of drills, one which starts at 0.3mm with 0.05mm increments up to 1.6mm and another that goes from 1.5mm to 6.5mm.
  • Razor saw - While almost any small saw will do, the fine teeth and thin blade of a razor saw is ideal for this kind of work.
  • Plier - Highly optional but sometimes you just need that extra bit of leverage and any kind of pliers will give you that. Just make sure that the inside of the jaws are smooth so you don't end up with ugly marks on the plasticard.
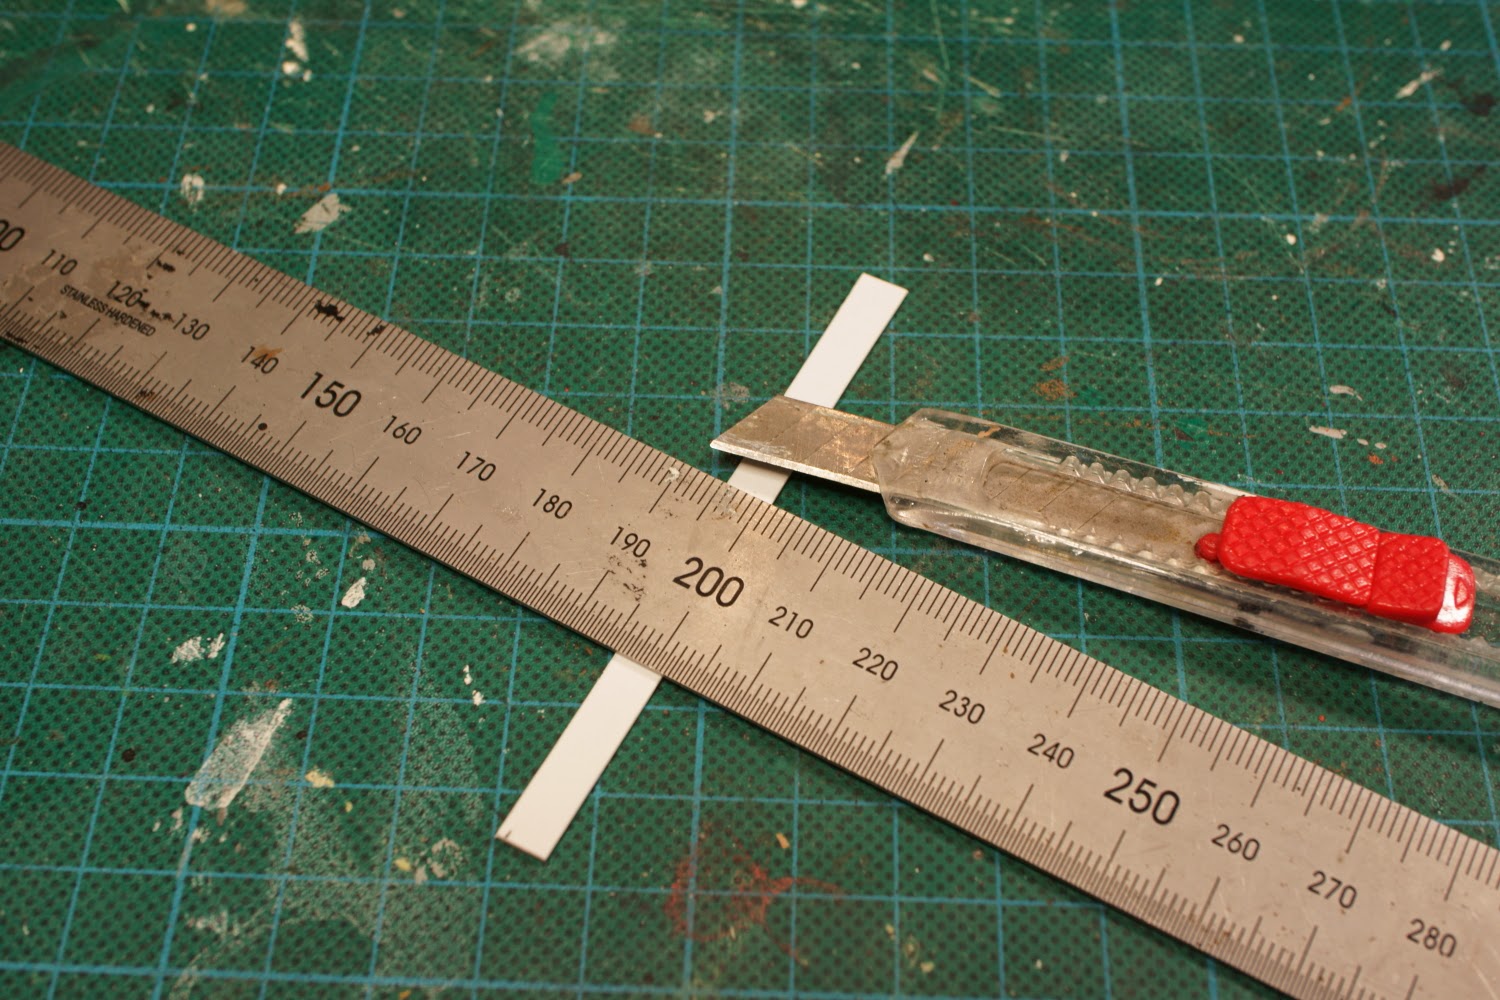
  • Measuring tools - A good steel ruler is the bare minimum of what you need. I also use a smaller aluminium ruler (though to be fair it is kind of crappy), a calliper and an angle ruler. The smaller a build is, the higher the precision needs to be.

  • Profile tool - Highly optional but there have been situations where I truly wished I would have had one close at hand.
  • Pipe cutter - Strangely enough not very useful for cutting plasticard tubes, but it is good for creating panel lines on a perfectly round surface. Still, not something that is used terribly often.
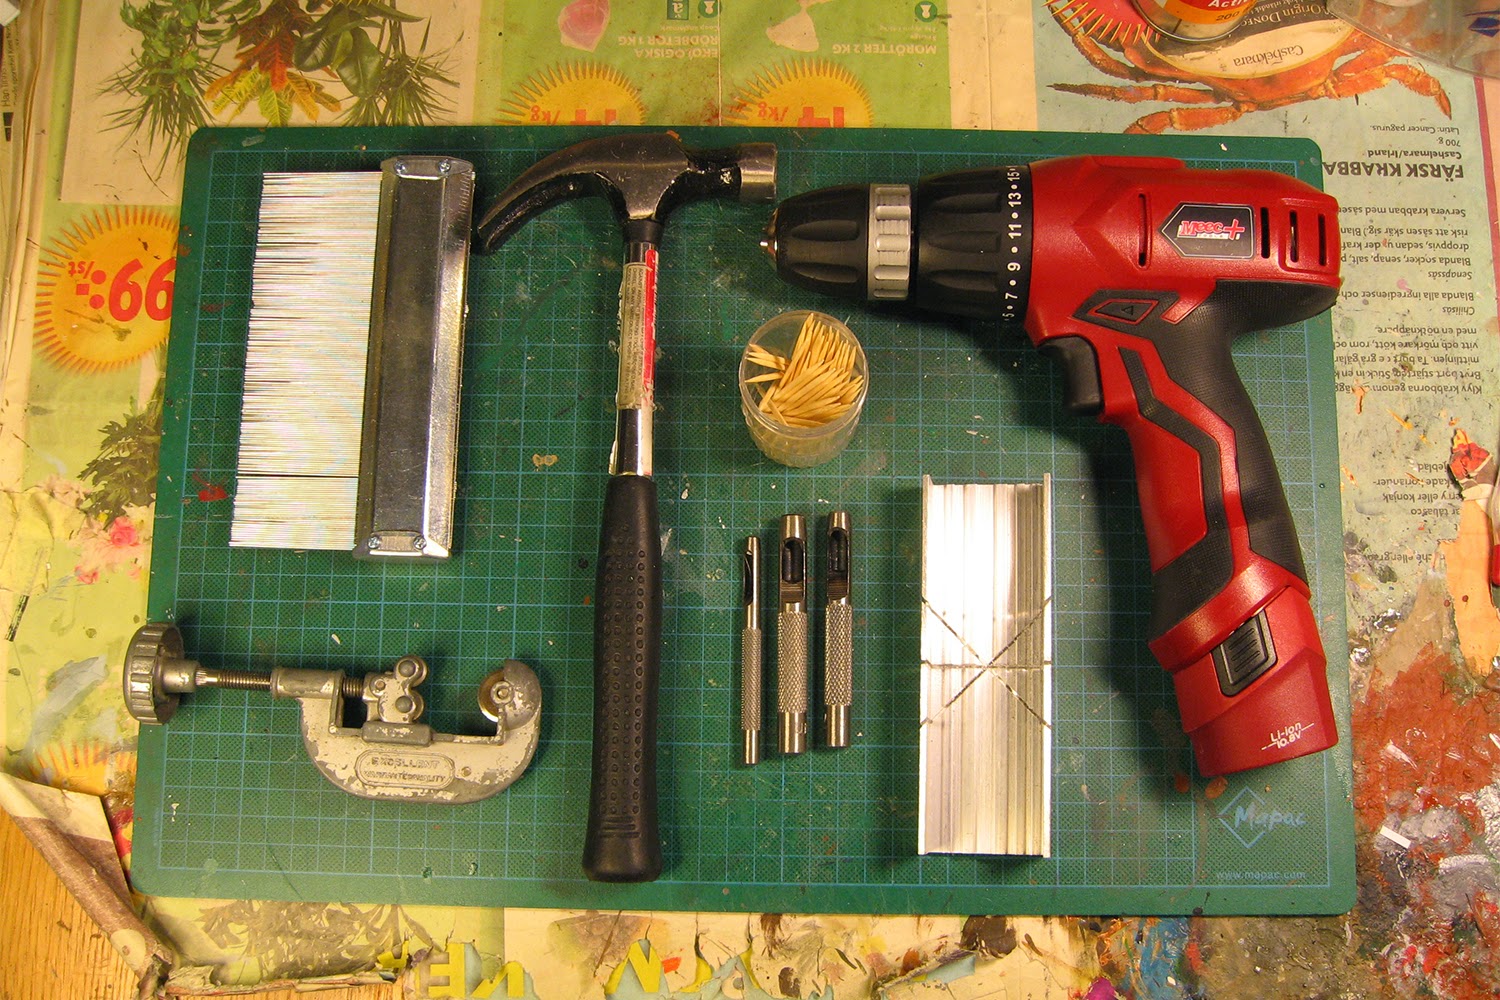
  • Hammer and hole punch set - In the words of Jeremy Clarkson of Top Gear, 'Right, where's my hammers?' Seriously though, a hammer should only be used in conjunction with a hole punch set (or to demolish a particularly horrible failure). A compass/circle cutter might be a better choice.
  • Toothpicks - Yes, toothpicks. Seriously, don't knock it until you try it. Toothpicks can be used as tools, building material, glue and paint applier, mixing sticks and any number of applications. Don't enter your hobby room without them.
  • Mitre box - Optional but extremely useful. It's gotta be fairly small as a standard mitre box is just bloody gigantic for this kind of work.
  • Power tools - The manliest part of your arsenal! A battery powered drill will help immensely when doing large scale drilling. Most pin vises can't even fit the larger drill bits so you kind of have to use a power drill for some situations. I also have a Dremel type rotary tool that can be used for all kinds of things, though to be fair it isn't always the best choice for plasticard. The high speed of a rotary tool has a tendency to melt the plastic rather than cut or grind it.

And there you have it, the tools I use for creating my scratchbuilds. I hope this series will helpful. Next time, chemicals and materials.

Scratchbuilding tutorial part 2: Chemicals and material

And here is the second part of my beginner tutorial on scratchbuilding. This will mostly deal with the types of glue, modelling clays/fillers and materials that I use when creating my models.

  • Super glue - Cyanoacrylate or super glue as it is more commonly known is a must. I can't recommend using it for an entire build but it is very good for strengthening the bond of something you've first glued with plastic cement. Medium viscosity super glue is the most common and is probably the easiest to use.
  • Super glue accelerator - While super glue hardens quickly if used correctly, sometimes that just isn't fast enough or the parts to be glued do not get a good grip on each other. This is where the accelerator comes in. Even a small burst of accelerator will speed up the curing process considerably to the point that it almost feel instantaneous. However, accelerator fluid is rather unhealthy, particularly the vapours, so use it with caution.
  • Milliput and liquid Green Stuff - For sculpting, filling holes and removing small marks and imperfections I use a combination of standard Milliput, superfine Milliput and liquid Green Stuff. Milliput is a two-part epoxy putty similar to Green Stuff that comes in many varieties. I use the standard Milliput for sculpting and large scale filler/repair while the superfine version is mostly used as filler. The best part of Milliput is that it doesn't shrink, which cannot be said of liquid Green Stuff. GWs contribution is still useful but only as a second stage filler when the imperfections has become so small that the shrinking isn't much of a problem.
  • Epoxy glue - I do not often use Epoxy glue but it's very good to have around for the few situations that I really need it for.
  • Magnets - Neodymium magnets are all the rage amongst modellers nowadays and with good reason. While strictly not necessary to complete a scratchbuild, they do present a number of additional options for a builder that wants to go the extra mile. I myself have used them to good effect in a number of builds, making arms and weapons changeable.
  • Piano wire - Stiff wire of some sort is very useful for pinning parts into place. It doesn't have to be piano wire specifically but it is easy to find and readily available on most good hobby stores. I use 1mm and 0.5mm piano wire for all kinds of projects as the extra strength it lends parts is often invaluable.
  • Plasticard - Yes, you are going to need plasticard, that much should be obvious. I couldn't possibly tell you what you need, that all depends on what you are building. I will however say that I find 0.75mm plasticard perhaps the most versatile as it is thick enough to hold up well in most situations, yet thin enough to cut and sand down fairly easily. 0.25mm on the other hand is what I mostly use for decoration. Evergreen Scale Models make most of the plasticard I have but there are several manufacturers and makes so it can really pay off to have a look around.
  • Leftover box - It is nigh impossible to use a sheet of plasticard completely. You will be stuck with a fair amount of leftovers and sometimes failed components, no matter what you do. However do no throw away this, it is a valuable treasure for future builds so keep it in a box where you can easily search through it.
  • Bits - There is one truth above all others when building miniatures for wargames and that is to never throw away anything! The lack of a well stocked bits box can make or break an entire build. The one shown above is really just one of several I have collected over the years and will likely just become more in the future.

And that's the second part! Stay tuned for the third and most likely final part, how to actually build.

Scratchbuilding tutorial part 3: How to build

And finally we arrive at the third and final part of my little series on scratch building. This will part will deal with the basics of handling, cutting and scribing panel lines on plasticard.

Anyway let's start with making your first part. Here I've used a leftover 1mm plasticard strip that I cut from a larger sheet. Place the ruler where you want to make the cut, take your favourite cutting implement and drag it along the intended line, putting some pressure on the knife. Do NOT cut all the way through!

The picture above shows the resulting cut. Not very much to look at, but it will more than suffice for what comes next.

Next you take the plasticard piece in question and firmly bend close to the cut until it snaps. This is by far the fastest and most efficient way to handle plasticard. On thinner pieces like 0.13 and 0.25mm thick plasticard you can often just cut all the way through with little effort but that will be not sufficient for thicker plasticard. In fact, fact when cutting really thick plasticard you should utilize your scribing tool as well.

Here I have a 2mm thick leftover piece. The procedure is almost the same just with an additional step. First, before using the knife, you make a grove with your scribing tool. Just take the tool and drag it towards you while putting pressure on it. The point on the 'hook' is what does all the work so take care to not damage it.

When you have your groove, just repeat the steps showed earlier. While strictly not necessary, cutting with the knife inside the grove will help with the snapping procedure. In this case I also took the opportunity to make some panel lines on top of the part. Unfortunately they are not very visible in the above pictures but making them couldn't be simpler. Just use the scribing tool as mentioned above but use less pressure than before.

Using a scribing tool without a ruler or some kind of guide is not something I can recommend but sometimes it has to be done. Even worse is any kind of rounded surface or indeed a tube or pipe! For these situations I've developed the following method. First I use some masking tape that I make a couple of layers thick. This forms my 'ruler' and I tape it along the line I wish scribe. Secondly I take a normal knife and score the line. After that I take the scribing tool and slowly push it away from me along the previously scored area. This widens the line and makes it possible to start using the scribing tool as it was intended. It is a slow and fickle process and not always entirely successful but it is certainly better than doing it freehand.


A common problem when cutting plasticard, which is especially pronounced with thicker plasticard, is that the plastic tend to curl upwards and away from the cut. This is understandable as the material has to go somewhere and the path of least resistance is away from the knife. You'll have to excuse my poor drawing skills but the above picture shows a basic view how it looks from the side. This can be very hard to spot before you start painting as white plastic just doesn't produce enough shadows to properly highlight these areas. As a precaution, it is a good idea to always scrape a knife along the edge of any cuts.


Another problem is that the cut is often not as smooth as one would like and yet again it is a problem more pronounced with thicker plasticard. The first picture above shows the end of the 2mm piece I cut earlier and the second one shows an exaggerated profile view. Always be prepared to file and sand every piece you make. Part of this can be alleviated by using a saw but that option isn't always available, especially on a really big pieces.


When you have your pieces ready it is time to start assembling them. In the above picture I've used the previously cut pieces to form a simple L-shape. These two pieces were simply glued together with plastic cement. Of course, even the fastest curing plastic cement can take some time before the process is finished. This is both a strength and a weakness. A strength in that before it has hardened completely you can still reposition the pieces slightly. However it's a weakness when you just need something you've built to hold up itself very quickly.

In the second situation I usually put a dab of super glue inside the join and spray it with some accelerator. Instant curing and provides pretty good stability as well. Of course, in other situations you need to strengthen the join between pieces and I usually go for some square plasticard. Angles are available and while they are better than squares, you get half the amount compared to squares. On particularly large builds you might need internal structures to hold everything up but I couldn't possibly advice you on what to use, it all depends on the build after all.


When the shape is finished you need to start consider filling and sanding. No matter how well you prepare a piece there will always be a chance that it wasn't perfect. Most commonly this will show along any seams so it's there you need to concentrate your efforts. While I haven't done it in the above picture I would have first filed down or cut away any excess material, and put filler, like Milliput or Green Stuff, along the seam. When cured, this would later be sanded down and filled again if there was a need for it.

Finally I will spend a few words on economical use of plasticard. Whatever you do, don't cut plasticard as can be seen on the left sheet. That leaves strange and unusable shapes and makes it hard to cut more pieces with precision. It is far better to cut long, straight strips and put the leftovers from the strip in your leftover box. The sheet on the right should be proof enough. It started as a full sheet of plasticard that I have cut several strips of differing sizes from until it's about a third left of it. However, unlike the sheet on the left, I will have no problems cutting any additional pieces from it.

And that concludes my tutorial. It is my hope that this will help any beginners to start up their own pieces of art. Until next time!

Afterword: I wrote these articles last year and put on my blog but I figured now that we have a dedicated sub-section it would be a good idea to post it here as well. I apologize for any formatting errors as I just copied and pasted from my blog.

One thing I'd like to add. I've done a bit of scratchbuilding myself, and the thing that stands out the most is how easy it truly is. Don't be intimidated by something that looks too hard. Cut a few pieces and stick them together. If you like it, keep going. If you don't, toss them and try again. One of my first scratchbuilding projects was a six foot long ore boat for a model railroad layout. It started as a kit with a one-piece vacuum-formed hull (yes, six feet long!). I used the hull and the funnel and scratch built the rest. Superstructure, hatches, unloading boom and a fully detailed pilothouse. If I can do it, anyone can!

Great job on the tutorial. Very thorough.

Yeah it is easy to build... kinda, but this articles will help you, because we all have our own methods. You can always learn new and better methods and fun tricks.

Great stuff MAC!

:D

Great stuff here! :D

Let me add in something that is invaluable when making a big ship with a lot of detail or a small ship with a lot of repeating detail, or something similar: resin casting. Casting is really easy if you just take it slow and go one step at a time, and is both economical and fast for making tons of detail.

Let's say you're trying to make a trench on your ship like on the Star Destroyer. If you don't want to use a TON of detail parts, then building a section if detail -- or several sections for variety -- then casting multiple copies of it is much faster and easier than trying to build the whole thing out of individual parts.

Here's a great article on how to do this: http://starshipmodeler.com/basics/jc_molds.htm

Edited by Millennium Falsehood

One thing I'd like to add. I've done a bit of scratchbuilding myself, and the thing that stands out the most is how easy it truly is. Don't be intimidated by something that looks too hard. Cut a few pieces and stick them together. If you like it, keep going. If you don't, toss them and try again. One of my first scratchbuilding projects was a six foot long ore boat for a model railroad layout. It started as a kit with a one-piece vacuum-formed hull (yes, six feet long!). I used the hull and the funnel and scratch built the rest. Superstructure, hatches, unloading boom and a fully detailed pilothouse. If I can do it, anyone can!

Great job on the tutorial. Very thorough.

Oh yes, it is much easier than one might expect. Previous modelling experience does helps of course, but more importantly you need to be able to think outside the box. Small scale modifications and conversions on store bought models was where I started and now I'm scratchbuilding entire models. I do recommend trying to think in terms of squares and cubes whenever possible as they are easy to build and visualise.

Great stuff here! :D

Let me add in something that is invaluable when making a big ship with a lot of detail or a small ship with a lot of repeating detail, or something similar: resin casting. Casting is really easy if you just take it slow and go one step at a time, and is both economical and fast for making tons of detail.

Let's say you're trying to make a trench on your ship like on the Star Destroyer. If you don't want to use a TON of detail parts, then building a section if detail -- or several sections for variety -- then casting multiple copies of it is much faster and easier than trying to build the whole thing out of individual parts.

Here's a great article on how to do this: http://starshipmodeler.com/basics/jc_molds.htm

I've only done small scale casting using something called instant mold/magic mold . It is a reusable, heat activated putty that is used to make simple molds of whatever you want to. The 'casting' is just simply pressing some Green Stuff or similar modelling material into the mold.

I've only done small scale casting using something called instant mold/magic mold . It is a reusable, heat activated putty that is used to make simple molds of whatever you want to. The 'casting' is just simply pressing some Green Stuff or similar modelling material into the mold.

Mac I would not let it keep me awake at night. The real casting that looks clean and is pit-free cost money to setup. You are better off for what we do in these special one off projects to do what you have been doing.

Your work looks better than anyone else, so it ain't broke, it don't need a fix or upgrade

Now if you wanted to produce your work, then contact a professional casting house with the right equipment...

:)

Actually, casting in resin with RTV silicon rubber molds costs less than Instant Mold, and produces far better results. Liquid resin is very thin and flows into all the crevices of the mold, reproducing the finest of details with ease. You just have to knock away the air bubbles as it's setting up, which is easy to do with a toothpick or a bamboo skewer.

One of the best tools is the Mini Alumalite Casting Kit, which is only $30. You get about two or three times the mold-making material that you get in a package of Instant Mold plus resin and mold release, and it can be used as many times as you want. Put the mold in a cupboard and when you need it, pull it out and use it again. It's a FAR greater value for your money.

Another advantage of the RTV silicon rubber mold that you make with an Alumalite kit (or any other mold-making RTV, like Oomoo, my personal favorite) is that you can reproduce delicate details without destroying the original by pressing it into a firm substance like Instant Mold. Try molding an antenna array with Instant Mold, or a machine gun or any other thin, delicate parts...

And again, it's not much harder than any other method of scratchbuilding.

Edited by Millennium Falsehood

Actually, casting in resin with RTV silicon rubber molds costs less than Instant Mold, and produces far better results. Liquid resin is very thin and flows into all the crevices of the mold, reproducing the finest of details with ease. You just have to knock away the air bubbles as it's setting up, which is easy to do with a toothpick or a bamboo skewer.

One of the best tools is the Mini Alumalite Casting Kit, which is only $30. You get about two or three times the mold-making material that you get in a package of Instant Mold plus resin and mold release, and it can be used as many times as you want. Put the mold in a cupboard and when you need it, pull it out and use it again. It's a FAR greater value for your money.

Another advantage of the RTV silicon rubber mold that you make with an Alumalite kit (or any other mold-making RTV, like Oomoo, my personal favorite) is that you can reproduce delicate details without destroying the original by pressing it into a firm substance like Instant Mold. Try molding an antenna array with Instant Mold, or a machine gun or any other thin, delicate parts...

Here's the thing, molding equipment here in Sweden doesn't cost just 30$ but rather something in the style of 100$. And that's the cheap stuff. I've looked at importing but it doesn't seem to come very cheap when shipping costs are included. Might have to take a better look at the Alumatie stuff you are referring to.

Edited by MacrossVF1

You, Sir, won the interwebz! Thank you so much for this Tutorial!! :D

You, Sir, won the interwebz! Thank you so much for this Tutorial!! :D

I'm fairly certain that I need to do something a bit more spectacular to win that particular award, like riding a dolphin while shooting space nazis using a miniature Death Star with one hand and eating a baconburger (mmm bacon...) with my other hand. :D

First off, this is a great tutorial, and I thank you for it. I have been working on miniatures, doing conversions for years and I would say that I am fairly good at it. I am comfortable with using all the tools you mentioned and I have most of them. But I have never had the courage to tackle a project using plasticard to create something. It always seemed intimidating and the info that you give about cutting and scoring, while I have known that in the past, mentally, it never really clicked until reading it in this post. I especially liked your "crappy" drawings of the profiles and close ups. :D It really helps me to see how things could potentially turn out and to avoid/fix. I think that I may just try my hand at this whole scratch building thing. On a different note, It really sucks that you cannot get affordable casting supplies in your area, because your work is amazing and I would love to have a copy of it. Millenium is right, it is super easy once you know how and the results can be incredible, if you do a good job. I have cast many models where you can not even tell which is the original and which is the cast and have only used the RTV cheapo stuff that you can buy online.(for cheap, at least here in the USA) It can be especially useful to ad detail to a bunch of models at once without converting each one, I once added tread to the bottom of the boots on my kneeling space marine and made a cast of the kneeling legs with the boot treads. It was great because I instantly had many pairs of kneeling marine legs, and I had only to do the custom tread one time. Win-Win. So if you can ever find a cheap alternative, I think you should look into it, as you could probably make a lot of money. And we all know this X wing addiction we all share is not cheap!!! ;)

First off, this is a great tutorial, and I thank you for it. I have been working on miniatures, doing conversions for years and I would say that I am fairly good at it. I am comfortable with using all the tools you mentioned and I have most of them. But I have never had the courage to tackle a project using plasticard to create something. It always seemed intimidating and the info that you give about cutting and scoring, while I have known that in the past, mentally, it never really clicked until reading it in this post. I especially liked your "crappy" drawings of the profiles and close ups. :D It really helps me to see how things could potentially turn out and to avoid/fix. I think that I may just try my hand at this whole scratch building thing.

If my tutorial help you then it has achieved its purpose. Glad to be of help. :) Now go forth and create something awesome my young padawan!

Just posting in order to bump this thread to the front.

The info is something that anyone curious in modding should check out.

First up, amazing article MacrossVF1, and very inspiring! I have plenty of experience kitbashing and converting existing models, but never really thought of giving scratchbuiding a try. I might have to now!

Secondly...

Actually, casting in resin with RTV silicon rubber molds costs less than Instant Mold, and produces far better results. Liquid resin is very thin and flows into all the crevices of the mold, reproducing the finest of details with ease. You just have to knock away the air bubbles as it's setting up, which is easy to do with a toothpick or a bamboo skewer.

One of the best tools is the Mini Alumalite Casting Kit, which is only $30. You get about two or three times the mold-making material that you get in a package of Instant Mold plus resin and mold release, and it can be used as many times as you want. Put the mold in a cupboard and when you need it, pull it out and use it again. It's a FAR greater value for your money.

Another advantage of the RTV silicon rubber mold that you make with an Alumalite kit (or any other mold-making RTV, like Oomoo, my personal favorite) is that you can reproduce delicate details without destroying the original by pressing it into a firm substance like Instant Mold. Try molding an antenna array with Instant Mold, or a machine gun or any other thin, delicate parts...

Here's the thing, molding equipment here in Sweden doesn't cost just 30$ but rather something in the style of 100$. And that's the cheap stuff. I've looked at importing but it doesn't seem to come very cheap when shipping costs are included. Might have to take a better look at the Alumatie stuff you are referring to.

...you guys need to go into business, you'd make a fortune! :lol:

Huh, talk about a Resurrection from the dead. I suppose I should try to get this thread moved to the proper sub-section.

This is an awesome thread. I paint my ships when I have time and have wanted to do some modding but had no idea where to start. Problem #1 is solved, just need to find more time...

Hope you don't mind me dropping a hint in here, but one thing I used to use years ago, and have just started building my supply up again, is stretched sprue (have a look for videos on Youtube ;) )

...handy if the smallest diameter commercial plastic rod you can find is 1mm, and you want to model pipes less than 270mm for detailing work...getting the larger diameters [1mm < n < 0.5mm] can be a little tricky, though :unsure: 
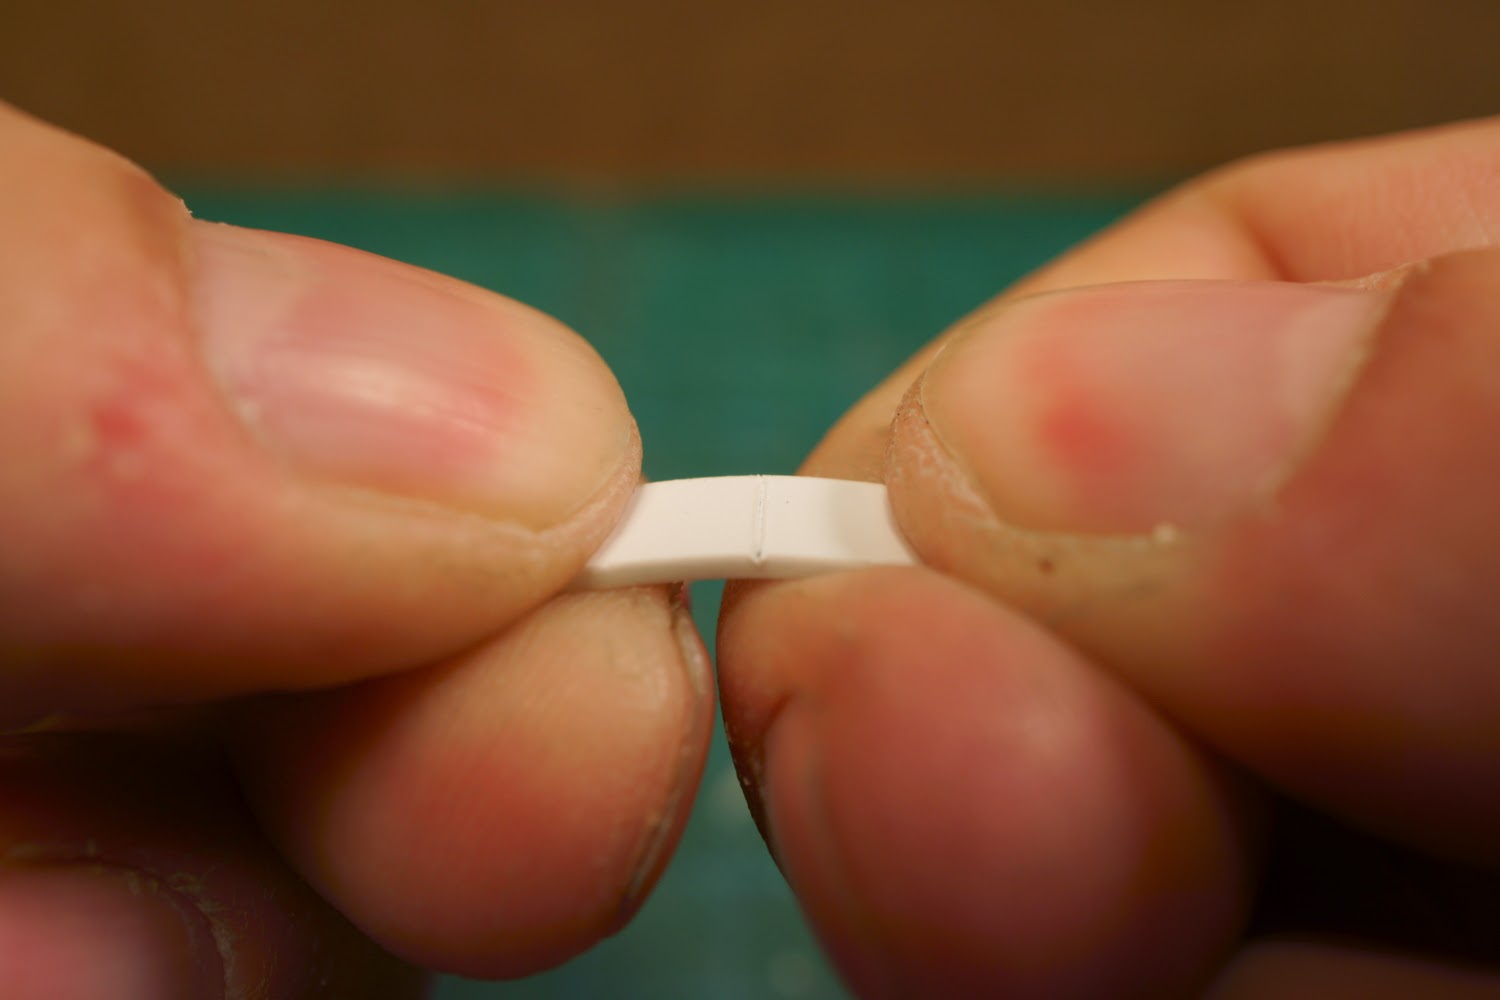
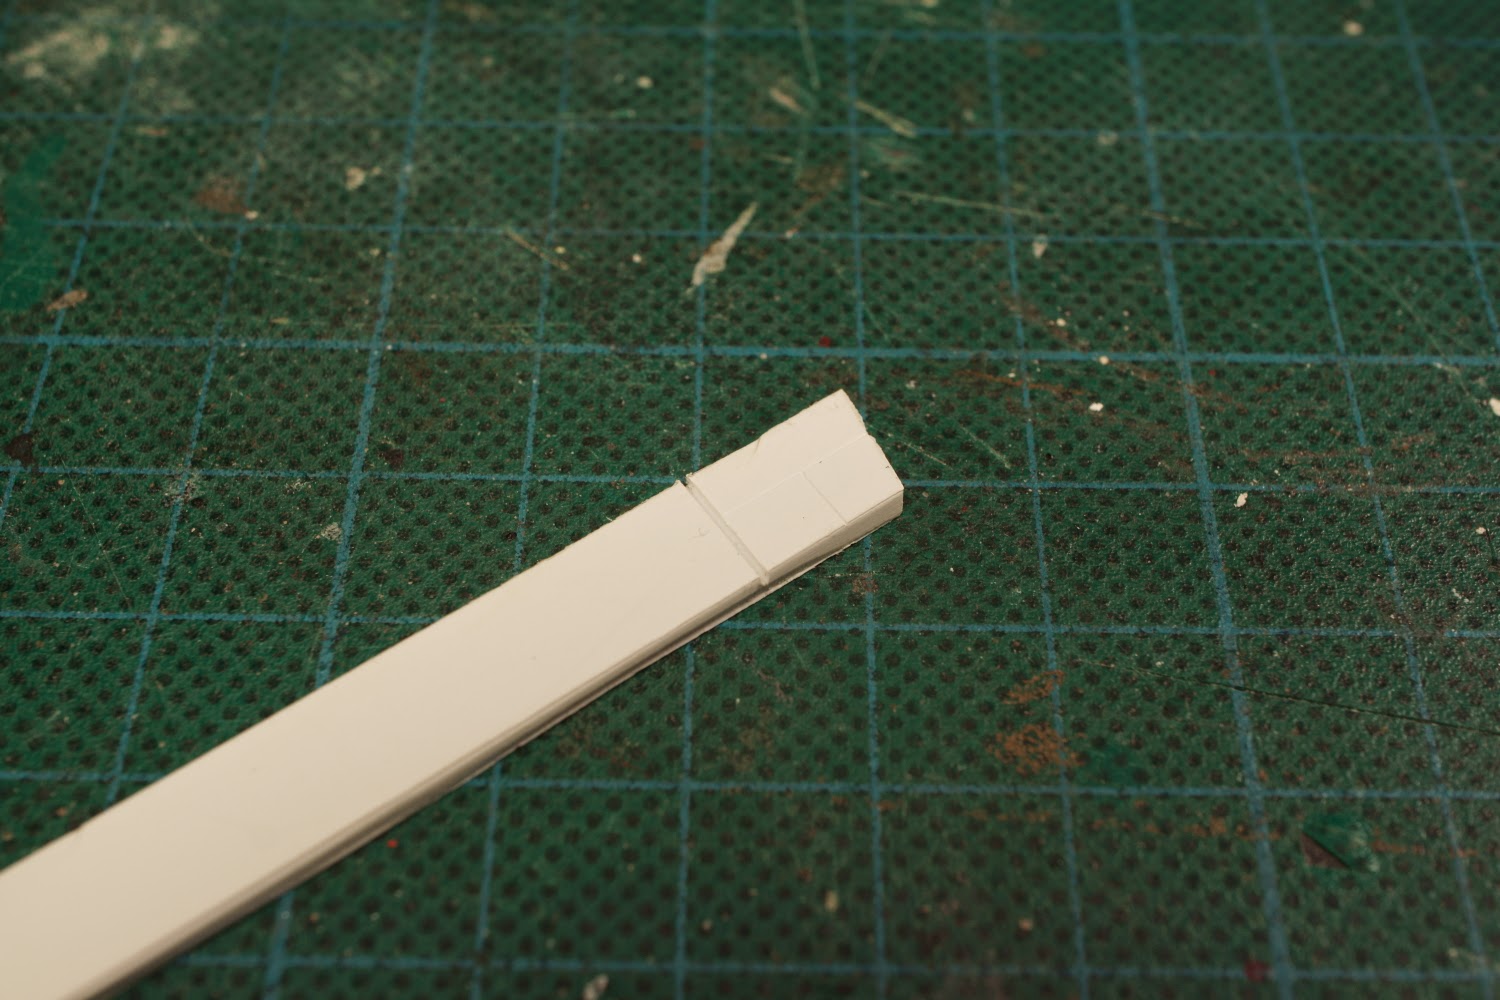
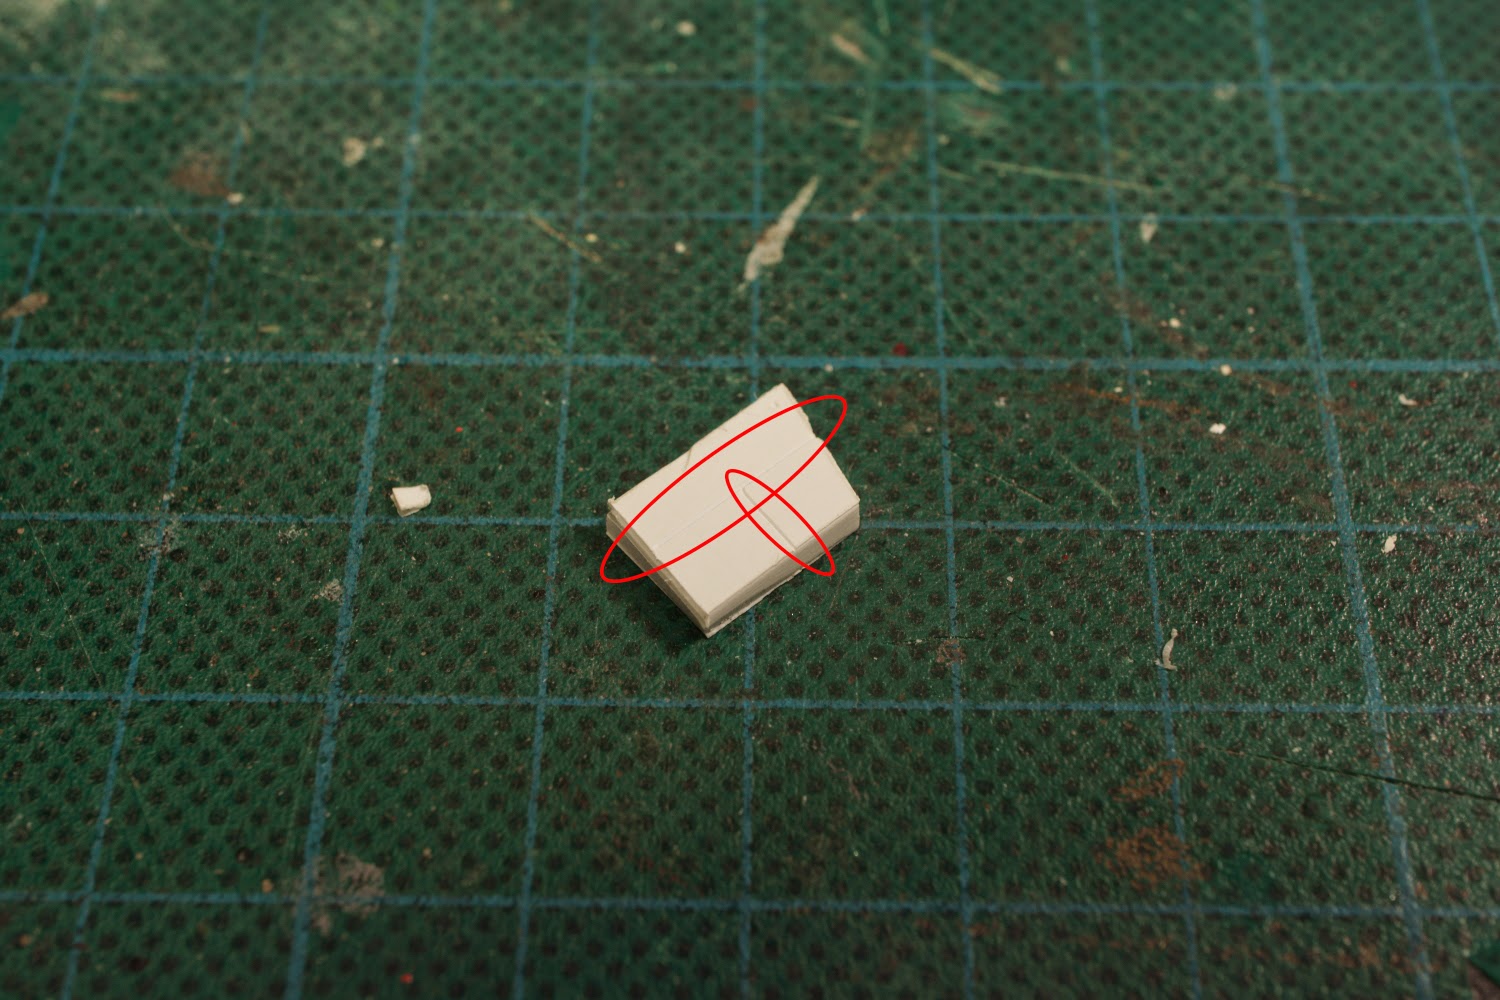
...all too easy to end up with lots of hair-thin lengths, which aren't too useful :rolleyes:

Cheers

Further Tips:

When scoring and snapping plasti-card, as pointed out it doesn't always often result in a clean perpendicular surface - even worse still it can produce an angled of concave "cut" surface which "under-cuts" the intended piece*, which causes it to be short of the desired dimensions if you sand/file back to plumb. So, include a small margin for wastage - it's easier to sand/file away the excess than try to back fill (or re-cutting, with more custom pieces).

( * = ie, sort of like the opposite of the picture in post #4 )

If you use a scalpel-style hobby knife (with replaceable blades) and one has gone blunt, don't throw it away (the golden rule for everything, as said) - even work on making it more blunt. I have an old blade so blunt it wouldn't cut anything more than butter - but it makes a great sculpting tool (especially as it's almost free of notches).

( and, what is more, is extremely useful at prying the plastic dial joiners apart with minimal indentation on the back of the dial )

Edited by ABXY

So this is great, and exactly what I was looking for. I am bumping this so more people can see it.

Edit: also maybe this could be moved to the painting subforum?

Edited by gryffindorhouse