Alright I've finished it, and have a little video showcasing how I'd play it, set it up, and the whole deal.
Alright I've finished it, and have a little video showcasing how I'd play it, set it up, and the whole deal.
DUDE@Crabbok I'm wearing the same shirt! Cool vid!
Will you also be making a Death Star surface, for either side of the trench?
Will you also be making a Death Star surface, for either side of the trench?
Probably not. There are already GF9 maps that have that covered.
You should turn it sideways, lock it between the two tables and you have the side edge of a Star Destroyer. 2 for one scenery!
I think you should do your own surface pieces also so that they all match up. It will give a better appearance than the retail mats laid alongside your nice piece.

I like Degobah Dave's trench run scenario and we use that with a few house rules. You should at least take a look at his and others to gather any ideas you want to incorporate into your own concept.
I like the Adv Torp requirement, as that will take care of any long range shots on the port.
You should consider keeping the turrets though, they honestly have made very little difference in our games but they add flavor to the game.
I have read through DagobahDave's scenario and I personally find it too complex. I don't like the idea of turrets for this map, because I figure we are already adding extra rules and I don't want to add even more. I want a game on this trench to be quick. I don't want it to last 3 hours. I want to be able to finish it in an hour or less.
The rules I'm thinking of using now:
No K-Turns in the Trench
Any torpedo or Missile can be used, but must be shot at range 1 of the exhaust.
At least one natural crit must be rolled before any modification - in order to cause a chain reaction.
Ships entering the trench may only enter from range 1 of the far edge.
Entering the trench requires an action - else the entering ship suffers 1 damage.
No ship may enter the trench at the Exhaust side (Due to smoke being expelled - it is an Exhaust after all)
Bumping the wall at a slight angle causes you to straighten out and roll 1 damage die and suffer the result.
Bumping the wall at a steep angle incurs 2 damage dice.
Flying directly into the wall is instant death.
Exiting the trench also consumes an action.
Scenario can be reversed so that Imperials Attack the Trench and Rebels Defend.
I have read through DagobahDave's scenario and I personally find it too complex. I don't like the idea of turrets for this map, because I figure we are already adding extra rules and I don't want to add even more. I want a game on this trench to be quick. I don't want it to last 3 hours. I want to be able to finish it in an hour or less.
It really is not that complicated.. it's quite simple, really. It seemed complicated to me, too, at first, but just do a solo walk through of it to get a feel for the mechanics first and I think you will appreciate just how simple and effective Dave's scenario really is. Of course, you can come up with your own rules but I still maintain that Dave's is both simple AND dramatic, as you are racing against the clock, as well as fighting off enemies. I have yet to see a better version of rules that capture all the essential elements of the epic cinematic battle.
Just my opinion, not a sponsored endorsement. ![]()
My Death Star Trench Run scenario (and some other X-Wing stuff) is on this page -- on the right side, scroll down a bit:
I have an idea for trench run rules but it is pretty basic and probably something that anyone else would think of.
You have a trench in the middle of the table with the exhaust port on one end. pretty typical. You have up to 2-4 large ship bases to act as turbo laser turrets.(melinium falcon/ Slave 1) bases. That the imperial player places anywhere on the map but limited to 1 in the trench. (Havent figured out the stats but I am thinking around 6 hull points. The Turbolasers on the surface has 360 degree firing arc. The one in the trench has the slave 1 firing arc. Also thinking of corvette turbolaser where it is 2 to 5 range but defenders get to roll twice as many evade dice. The trench turbolaser can fire at 1 range at fighters in the trench and fighters don't get double evade dice.
Rebel's goal to use proton torpedoes (advanced proton torpedoes also okay but have to be in range 1) to get a double critical hit. So target lock and 2 critical hits on the exhaust port. Fighters can enter the trench from the half of the trench that is away from the exhaust port. If they can line up their firing arc to both corners of the exhaust port end then they can enter the trench (pivot to face straight) Fighters in the trench are considered below the surface and thus move first before the surface. If the base of another ship that is NOT in the trench would be in the way then flip that ships movement tile and move the ship out of the way. Ships out of the trench should not block ships that are in the trench. Ships that are in the trench can only shoot at other ships (or turbolaser turrets) that are also in the trench. Ships in the trench can only be targeted by ships or turbolaser turrets that are in the trench. If a ship does a maneuver that would have its base touch the borders or leave the trench than that ship has left the trench and is now above the surface. It will have to re-enter the trench at the back half again.
Imperial's goal is to get within range of the rebel base and commence primary ignition. Use a maneuver dial (tie fighter or lambada shuttle) to represent the range. After each turn move the dial 1 space over. When the dial has made a full revolution then the death star is in range and can commence primary ignition. At the end of each turn roll 3 attack dice. Here are the results.
All blanks. The Imperials loos 1 charge token.
No hits but 1 or more focuses. The charge remains the same.
1 or more hits. Imperials gain 1 charge token for each hit (2 for critical hits)
If the imperials gain 7 or more charge tokens then the rebel base is destroyed.
The charge tokens make it so that there is a little random element in the turn for imperial victory but set up to provide The imperials with enough speed to destroy the rebel base.
I thought that too, but it's a full 3 feet long, which will pair up nice if placed against game boards. Course, I could always build a second one and line them up.
Looks great! There is a PDF online you could probably google, it's done up like a proper mission page that FFG puts out. Entire set of rules and I believe it's 2' x 4' with the long way being the trench and the 6" on one side being the entry to make the trench run
It would be nice if FF puts out say a Mission pack Death Star Trench run.
Models 2 Turbo-laser Turrets. 1 Y wing (because there is enough X-Wing pilots out there) and 1 Tie Fighter (Because you could never have too many Tie Fighters)
Cardboard cutout of Trench (with a flip side for rebel landing strip) and exhaust port (which can flip for a rebel Yavin Base)
Cardboard Range Dial for the Death Star with picture cards to flip symbolizing it firing the weapon.
Rules for two scenarios, the Trench Attack Run (Death Star) and Vader's revenge (Yavin Base Attack from Rouge Leader) with an option for transport escape objective. Imperial goal to drop 2 proton bombs on Rebel base (6 shields 2 hull).
For a Star Destroyer (scaled Down) I would say 2 CR90 Bases long plus a CR90 Width using 4 Large base for support (the First CR90 Base as the forward and the Width as the Back/Command Deck.) that way there is a CR90's length between the two bases so you can fly ships between it (give tokens to indicate if flying over or under the ship). I can even see the Nebulon B Cruiser only replace the CR90 with the Medium Transport bases.
Sure they will not be to exact scale but the representative scale would be spot on. Just a little scale distortion to make it playable in the game. 3 cards. Star Destroyer Front, Star destroyer Command Bridge(Have an alternative card for Victory class), Star destroyer Engines)
Update -
So my trench completely fell apart. All the glue that held certain pieces together re-melted in the heat of my garage. I've since been working on re-doing it without cardboard. Instead I'm doing the entire map out of insulation foam, and using toothpicks to reinforce each piece before I glue them together, forming a sort of, skeleton. Also using alot more glue, and storing the thing in the air conditioning so it doesn't melt in the Florida heat.
Here's a photo of my partial progress.

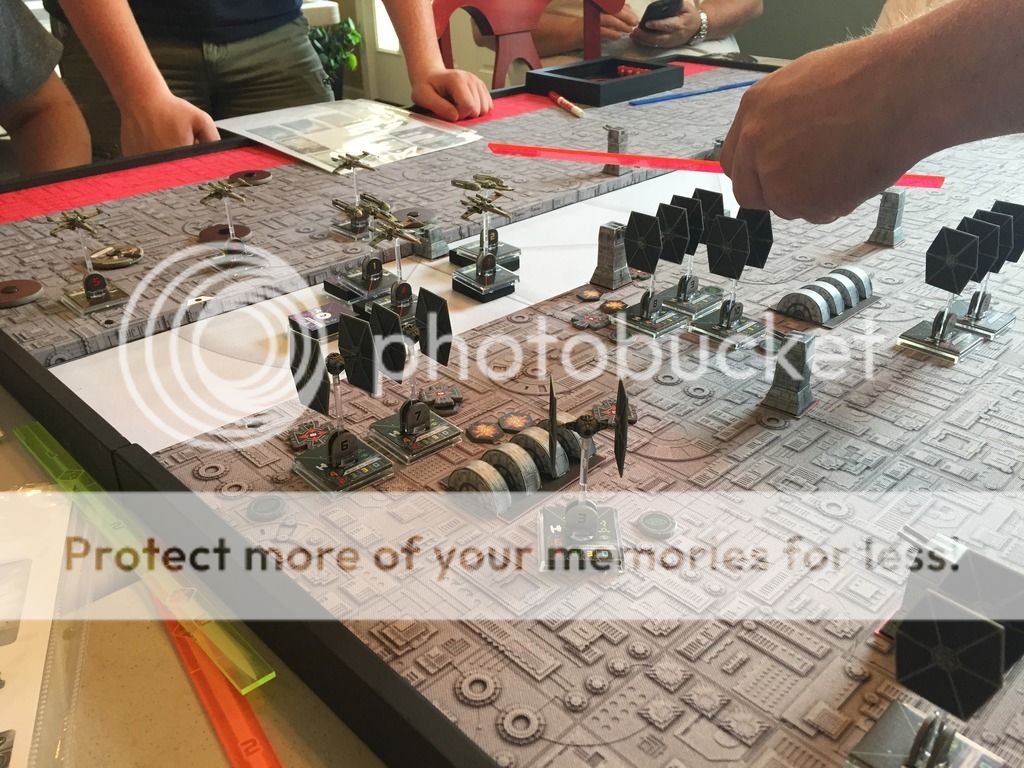
So I've been working on a trench for a couple weeks. It isn't finished yet but it's mostly there. I still have to add "wings" to it so that it will lay in between two tables, sunken down below the table line.
Having never played a trench scenario before, do you guys require any specific victory conditions? IE a regular proton torpedo hit on the port will win? or do you require an advanced proton torpedo?
I'm thinking an Advanced proton Torpedo would be required and you need at least one crit.
Thoughts?
That sir, is a thing of beauty... easily the best trench I've seen!
Must... Resist... Yo mamma joke...
I apologize, really I do. I have a rotten mind and no brakes.
Great work Crabbok!
Edited by DagonetI took a different approach for my trench. I didn't go for a very deep trench, mine is only about 1/2" deep. In my variant of Dagobah Dave's scenario (http://www.boardgamegeek.com/filepage/120061/death-star-trench-run-v08), ship movement is performed using the templates in the standard game. If my trench was too deep, given the large playing surface area, it might be too difficult to move the ships in the trench. Instead of using a "shelf" that runs across the trench for ships flying over the trench, we replaced the trench ships bases and models with wooden blocks bearing their ship identification and firing arcs. Other wooden blocks are used to keep the bases of overflying ships raised above the trench surface. It worked well for us. The turbo lasers and power nodes were made from card stock, printed from a freeware file available online. I am in the process of painting new turbos and power nodes using cast products from CombatZone Scenery out of the UK.
I'm thinking of saying this port rolls an auto 2 evades against any attack made against it. It requires a missile or torpedo attack, and needs a direct hit to kill it - meaning you deal damage cards, and hope your critical card is a direct hit, otherwise no blow. Each player would use his or her own damage deck when checking for the direct hit.